目次
Table of Contents
- この App について
- 買い物リストとしての典型的な使い方
- リストを作る方法
- iPhone App, iPad App と Apple Watch App
- ホーム画面
- 項目編集画面
- チェック専用モード
- リスト比較画面
- リンク設定画面
- リンク編集画面
- 設定画面
- バックアップ管理画面
- 他 App のリストを使う方法
- ウィジェット
- Apple Watch App のリスト一覧画面
- Apple Watch App の項目一覧画面
- Apple Watch App の設定画面
- コンプリケーション
- 困った時は
- バージョン履歴
- About this App
- Typical use as a shopping list
- How to make a list
- iPhone App, iPad App and Apple Watch App
- Home screen
- Item edit screen
- Check-only mode
- List Compare
- Link Settings
- Link Edit
- Settings
- Backup management
- How to use a list of other apps
- Widget
- Apple Watch App lists screen
- Apple Watch App items screen
- Apple Watch App settings screen
- Trouble shooting
- Version History
ようこそ
Welcome
- lightlist アプリをお使いいただきありがとうございます。
- この画面は lightlist アプリの使い方画面です。
- この使い方画面はアプリ画面の上部に表示される 情報ボタン を押せばいつでも表示できます。
- この画面を閉じるには右上の閉じるボタン を押してください。
- Thank you for using the lightlist app.
- This screen is the information screen of the lightlist app.
- This information screen can be displayed at any time by pressing information button displayed at the top of the app screen.
- Click the close button to close this screen.
この App について
About this App
- この App は シンプルで使いやすいチェックリストです。
- iPhone や Apple Watch を外に持ち出して買い物リストやToDoリストとして使いやすいように設計しています。
- iPhone 上の App でリストをメンテナンスし、Apple Watch や Widget で連動して使えます。
- 未チェックの項目のみを Widget に表示したり、iPhone App 自身もしくは Apple Watch で表示・チェックできます。
- Apple Watch でチェックした項目を iPhone App のリストに逆に反映することもできます。
- リストを複製したり、項目の一部だけをコピーしたりできます。
- 複数の店毎に別の買い物リストを作った場合、同じ名前の商品を買ってチェックしたら、自動的に他の店のリストにもチェックを反映することができます。これによって重複買いを避けられます。
- Apple Watch でチェックすると、そのリストにリンクした iPhone App や Widget の 他のリスト表示にも自動的に反映できます。
- リストをテキストとして簡単に他のAppや他の人に共有することもできます。
- iPhone App と iPad を App iCloud経由でデータ同期したり、データのバックアップを取ることもできます。
- This App is a simple and easy to use checklist.
- It is designed so that you can take your iPhone or Apple Watch outside and use it as a shopping list or to-do list.
- You can maintain the list in the App on the iPhone and use it in conjunction with the Apple Watch or Widget.
- You can display only unchecked items in Widget, or display/check them on iPhone App itself or Apple Watch.
- You can also reflect the items checked on Apple Watch to the list of iPhone App.
- You can duplicate a list or copy only some of its items.
- If you create separate shopping lists for multiple stores, if you buy a product with the same name and check it, the check will automatically be reflected in the list of other stores. can. This will avoid duplicate purchases.
- When checked on Apple Watch, it can be automatically reflected in other list displays of iPhone App or Widget linked to that list.
- You can also easily share your lists as text with other apps and people.
- You can also synchronize data between iPhone App and iPad via App iCloud, and backup data.
🔝
買い物リストとしての典型的な使い方
Typical use as a shopping list
- 1. まず iPhone App で買い物リストを作ります。
- 買い物リストを iPhone Appで作ります。
- リストの項目は売り場で歩く経路順に登録しておくとチェックする時に項目を探す手間が減らせて便利です。
- 2. 買い物に行く前に iPhone App で買い物リストの中の不要な項目をチェックします。
- 買い物時に買い物リストに表示したくない項目は、iPhone App で項目にチェックを入れておきます。
- 3. 買い物に行ったら Apple Watch もしくは iPhone で買い物リストを使います。
- Apple Watch App でその店用のリストを選び、買ったものからチェックしていきます。もしくは iPhone App でチェック専用モードで使います。
- Apple Watch で チェックした項目をまとめて削除することで、iPhone App にチェック状態を反映できます。
- 1. First, create a shopping list on iPhone App.
- Create a shopping list with the iPhone App.
- Registering the items in the list in the order you walk in the store will save you the trouble of looking for the item when you check it.
- 2. Check unnecessary items in the shopping list on your iPhone App before going shopping.
- For items that you do not want to appear in the shopping list when shopping, check the items on your iPhone App.
- 3. When you go shopping, use the shopping list on your Apple Watch or iPhone.
- In the Apple Watch App, select the list for that store and check the ones you bought. Or use it in the check-only mode on the iPhone App.
- You can reflect the checked status in the iPhone App by deleting all the checked items on the Apple Watch.
🔝
リストを作る方法
How to make a list
- 1. リストの追加
- 起動時のホーム画面で「新規リスト追加」の入力欄をタップして、リストの名前を入れてから「リスト追加」ボタンを押してください。画面の上に登録したリスト名が表示されます。
- 2. リストの選択
- ホーム画面の登録ずみリストから項目を追加・変更したいリスト名を選んでタップすると、項目編集画面に移ります。
- 3. 項目の追加
- 画面の下の ボタンの右側をタップすると新しい項目名が入力でき、改行入力で新しい項目として追加できます。
- 1. Add list
- On the home screen at startup, tap the "Create new list" input field , enter the name of the list, and then press the "Add list" button. The registered list name will be displayed .
- 2. Select list
- Select the list name you want to add / change from the registered list on the home screen and tap it to move to the item edit screen.
- 3. Add item
- Tap the right side of the + button at the end of the item name list to enter a new item name, and enter a line feed to add it as a new item.
🔝
iPhone App, iPad App と Apple Watch App
Differences between iPhone app and Apple Watch app
- 概要
- iPhone App (iPad App) と Apple Watch App の機能はデバイスの特性に合わせてできることが違います。
- iPhone App (iPad App) はリストの作成、編集、チェック、の全てが可能です。
- iPhone App と iPad App はほとんどの機能が同じですが、Apple Watch App と直接連携できるのは iPhone App のみです。
- iPad App は iCloud を通じて iPhone App と連携し、iPhone App を通して間接的に Apple Watch App と連携できます。
- iPhone App でリストの作成、編集、チェックを行うと、自動的に連携した Apple Watch App にもその内容が反映されます。
- Apple Watch App は基本的に iPhone App から送られてきたリストのチェックのみが可能ですが、一時的に項目の並び替えや削除なども可能です。
- Apple Watch App で項目チェックした状態は iPhone App に送って iPhone App のリストに反映させることができます。
- iPhone App と iPad App ができること
- リストを登録、編集することができます。編集として、名前の変更、リスト色の設定、並び替え、削除などができます。
- リストの項目を追加、編集、チェックすることができます。編集として、名前の変更、ラベル化、並び替え、削除、コピーや貼り付けなどができます。他のリストとの間で項目を比較してコピーしたり、他のアプリとテキストとして項目の共有も可能です。
- 項目のチェックをしやすいように、未チェック項目のみに絞り込んで表示したり、チェック以外に余計な機能を表示しないチェック専用モードを使ったりできます。
- 複数のリスト間で項目のチェック状態を連動させるリンク設定をすることができます。
- iCloud経由で他の iPhone App や iPad App とデータ連携させることができます。
- 全てのリストやリンクのデータをまとめて1つのファイルとしてバックアップできます。バックアップにはコメントをつけたり、iCloud で iPhone App と iPad App の間で共有したり、さらに他のAppで保存するために共有することができます。
- Widget としてホーム画面に登録すると、リスト先頭の未チェック項目を表示したり、ホーム画面から App を直接起動したりできます。
- iPhone App のみでできること(iPad App でできないこと)
- 更新したリストおよび項目を自動的に Apple Watch App に送信します。
- Apple Watch App からの再送要求に応じてリストや項目を再送できます。
- Apple Watch App からフィードバックされたチェック状態をリストに反映します。
- Apple Watch App ができること
- リストを iPhone App から受け取リます。
- iPhone App にリストの再送をしてもらうこともできます。
- Apple Watch App の中だけで リストの削除や並び替え、項目の削除や並び替えができます。
- Apple Watch App の中だけで項目のチェックができます。
- チェックした項目を削除したら iPhone App にチェック状態をフィードバックします。
- コンプリケーションとして時計の文字盤に登録すると、時計の文字盤から App を直接起動したり、リスト先頭の未チェック項目を1,2個表示することができます。
- Overview
- The features of the iPhone App (iPad App) and the Apple Watch App are different in that they can be adapted to the characteristics of the device.
- iPhone App (iPad App) can create, edit, and check lists.
- iPhone and iPad apps share most of the same functionality, but only iPhone apps work directly with Apple Watch apps.
- iPad apps can work with iPhone apps through iCloud and Apple Watch apps indirectly through iPhone apps.
- When you create, edit, or check lists in the iPhone app, the contents are automatically reflected in the linked Apple Watch app.
- The Apple Watch App can basically only check the list sent from the iPhone App, but it is also possible to temporarily rearrange and delete items.
- The status of checked items in the Apple Watch App can be sent to the iPhone App and reflected in the iPhone App list.
- What iPhone App and iPad App can do
- Lists can be registered and edited. As editing, you can change the name, set the list color, sort, delete, etc.
- You can add, edit and check items in the list. Editing includes renaming, labeling, reordering, deleting, copying and pasting. Compare and copy items to and from other lists, or share items as text with other apps.
- To make it easier to check items, you can narrow down and display only unchecked items, or use a check-only mode that does not display extra functions other than checking.
- You can set links that link the check status of items between multiple lists.
- You can link data with other iPhone App or iPad App via iCloud.
- All list and link data can be backed up as a single file. Backups can be annotated, shared between iPhone and iPad apps in iCloud, and shared for storage in other apps.
- When registered as a Widget on the home screen, you can display the unchecked items at the top of the list and launch the app directly from the home screen.
- What you can do only with iPhone App (What you cannot do with iPad App)
- Automatically send updated lists and items to the Apple Watch app.
- Lists and items can be resent in response to a resend request from the Apple Watch app.
- Reflects the check status fed back from the Apple Watch App to the list.
- What the Apple Watch App can do
- Receive list from iPhone App.
- You can also ask the iPhone App to resend the list.
- You can delete and rearrange lists and delete and rearrange items only within the Apple Watch App.
- You can check items only in the Apple Watch App.
- After deleting the checked item, feedback the check status to the iPhone App.
- When registered on the clock face as a complication, you can launch the app directly from the clock face and display one or two unchecked items at the top of the list. I can.
🔝
ホーム画面
Home screen
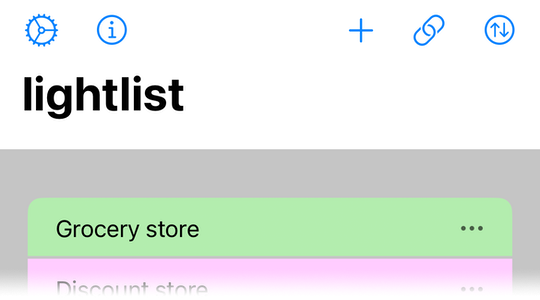
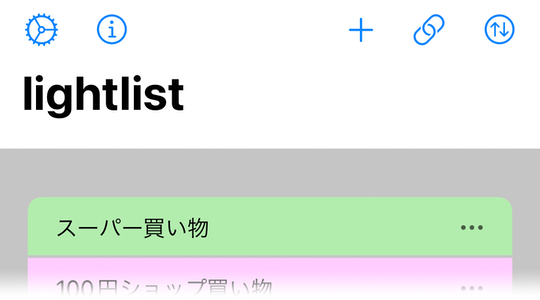
- ホーム画面について
- 起動時に表示されるホーム画面ではリストの作成や削除、並び替えなどができ、リスト名から項目編集画面を開くことができます。また、設定画面やリンク設定画面を開くことができます。
- 画面左上の歯車アイコン を押すと設定画面を開き、各種の設定ができます。
- 情報アイコン を押すと、この使い方画面が表示されます。他の画面でこのアイコンを押すと、その画面に合った使い方が表示されます。使い方画面内のリンクを移動した場合は、左上の戻るボタン で移動前の場所に戻れます。進むボタン で戻る前の場所に進めます。右上の 閉じるボタンを押すか、タイトルを下にドラッグすると画面から抜けられます。
- リストを追加するとリスト名が並び、リスト名をタップすると項目編集画面を開いてリストを編集できます。
- リスト名の右側にあるコンテキストメニューボタン を押すと、その項目にいろいろな操作ができるコンテキストメニューが表示できます。
- 画面右上のリンクアイコン を押すとリンク設定画面を開き、複数リスト間のリンクの設定ができます。
- リストの追加
- 画面の上のプラスアイコン をタップして新規リスト追加ウィンドウを表示してください。
- 名前入力欄をタップして、リストの名前を入れてから「リスト追加」ボタンを押してください。
- 「既存リストの上に追加」スイッチを ON にすると、登録済みリストの先頭に追加されます。
- 何もリストを登録していないときは「サンプル作成」ボタンが表示されます。このボタンを押すと、複数のリスト間のチェック状態を連動するリンク機能をお試しできるサンプルのリストが追加されます。サンプルのリストは不要になったら削除してください。
- リストの削除
- リスト名を左にスワイプすると削除ボタンが出てくるのでそれを押してリストを削除できます。
- リストの並び替え
- 画面右上の を押すと、リストの右側の をドラッグすることでリストを並び替えできます。もう一度 を押すと並び替えモードを終了します。
- リスト名の変更
- コンテキストメニューでタイトル変更を選んで名前を変更できます。
- リスト色の変更
- コンテキストメニューでカラーを選んでリスト毎の色変更ができます。
- リストの Apple Watch への送信
- コンテキストメニューでWatch に送信を選んで任意のリストのみを Apple Watch に送信できます。
- リストの複製
- コンテキストメニューでリスト複製を選んで、内容が同じリストを追加することができます。追加したリスト名の最後には + が付きます。
- About the home screen
- On the home screen that appears at startup, you can create, delete, and rearrange lists. You can open the item editing screen from the list name. You can also open the Settings screen and the Link settings screen.
- Press the gear icon at the top left of the screen to display the settings screen You can open it and make various settings.
- Press the info. icon to display this information screen. If you press this icon on another screen, the usage for that screen will be displayed. How to use If you move the link on the screen, you can return to the place before moving with the back button on the upper left. Forward button advances to the previous location. Press the close button on the upper right or drag the title down to exit the screen.
- When you add a list, the list names are arranged, and you can tap the list name to open the item edit screen and edit the list. increase.
- When you press the context menu button on the right side of the list name, a context menu that allows you to perform various operations will appear for that item. can be displayed.
- Press the link icon on the top right of the screen to display the Link settings screen to set links between multiple lists.
- Add list
- Tap plus icon at the top of the screen to display the add new list window.
- Tap the name input field, enter the name of the list, and press the "Add list" button.
- If you turn on the "Add above existing list" switch, it will be added to the top of the registered list.
- When no list is registered, the "Create sample" button will be displayed. If you press this button, a sample list will be added where you can try the link function that links the check status between multiple lists. Delete the sample list when it is no longer needed.
- Delete list
- If you swipe the list name to the left, a delete button will appear, so you can press it to delete the list.
- Sort list
- Press at the top right of the screen, on the right side of the list You can sort the list by dragging . Press again to exit sorting mode.
- Change list name
- You can change the name by choosing Change Title in the context menu.
- Change list color
- You can change the color of each list by selecting a color from the context menu.
- Send list to Apple Watch
- You can send just any list to your Apple Watch by selecting Send to Watch in the context menu.
- Duplicate list
- You can add a list with the same content by choosing Duplicate List in the context menu. The added list name has a + at the end.
🔝
項目編集画面
Item edit screen
- 項目編集画面について
- ホーム画面からリスト名をタップして表示される項目編集画面では、項目を編集したりチェックしたりできます。
- 画面上部の をタップして開くメニューではリスト全体の項目に対する処理を選ぶことができます。
- 各項目の右側にあるコンテキストメニューボタンをタップして開くコンテキストメニューでは、その項目に対していろいろな処理を選ぶことができます。
- 各項目の情報を変更する機能は項目名を右にスワイプすることによって表示されるボタンでも使えます。
- ラベルについて
- 複数の項目をグルーピングするために、任意の項目をグループ名を示す「ラベル」にすることができます。ラベルの下に続く項目は1つのグループとしてまとめて扱うことができます。
- ラベルはチェックボックス が無く、通常の項目よりも背景色が明るく文字サイズが大きい項目です。
- 項目のグループ毎にラベルを追加しておくと、そのラベルの下の項目をまとめて閉じたり、まとめてチェックしたりできるので、活用してください。
- 項目の追加
- 画面の下にある + ボタンの右側をタップすると新しい項目名が入力でき、Enter入力で新しい項目として追加できます。
- 各項目のコンテキストメニューの「この下に項目追加」を選ぶと、任意の場所に項目を追加できます。
- 画面の一番下にある「一括登録」を開いてその枠内をタップするとそこに改行で区切った複数の項目名をまとめて入力できます。「各行を項目として追加」ボタンや決定ボタン を押すとまとめて登録されます。
- 項目名として + で始まる名前を入力すると、その項目をラベルにできます。任意の項目を後からラベル化することもできます。
- 項目のラベル化
- 項目をラベル化するには、コンテキストメニューで「ラベルにする」を選ぶと、通常の項目とラベルを切り替えできます。項目のラベル化は、各項目を右スワイプした時に表示される「ラベルにする」「ラベルから戻す」ボタンでも行えます。
- 項目名の変更
- 項目を右スワイプするかコンテキストメニューを開くと、「名前編集」ボタンが表示されます。このボタンを押すと項目名の下に青線が表示され、項目名をタップすると名前を変更することができます。Enter を押すと名前変更が確定します。
- 名前変更を確定した時、このリストにリンクされた他のリストにも同じ名前の項目がある場合は、まとめて名前変更するかどうか選べます。もしリンクしたリストの項目名を一緒に変更することがない場合は設定画面で停止できます。
- 項目の優先度変更
- 項目を右にスワイプするかコンテキストメニューを開くと「優先度」ボタンが表示されます。このボタンを押すと優先度を高・中・低から選び、項目の優先度を設定できます。
- 買い忘れたくないものは優先度高、今は買わなくてもいいものは優先度低、のように項目の優先度を区別するのに使えます。
- 優先度中は既定値で、優先度高の場合は項目名の右側に赤い三角、優先度低の場合は青い三角 が表示されます。
- ラベルにも優先度を設定することができます。ラベルの優先度が中や低の時、ラベルの下にある項目の中で未チェックで優先度高のものがある場合は、赤い三角 が表示され、ラベルを折りたたんでも優先度高の項目があることがわかります。
- また、リストの中に1つでも未チェックで優先度高の項目がある場合は、リストのタイトルの横にも赤い三角 が表示され、見逃しを防ぎます。
- また、メニュー内のコピー機能や共有機能で高優先項目に絞って処理することもできます。
- 項目の個数変更
- 項目を右にスワイプするかコンテキストメニューを開くと「個数」ボタンが表示されます。このボタンを押すと個数を1から10までの間から選び、項目の個数を設定できます。
- 複数個買いたい項目などにその個数を設定することによって、項目名の右にその数を表示しておくことができます。
- 既定値は1で1を指定すると項目表示から個数表示が消えます。
- 項目のチェック
- 各項目のチェックボックス をタップするとチェックしたりチェックを外したりできます。
- メニューから「チェックとクリア」を選ぶと、全項目をまとめてチェックしたり、全項目のチェックをまとめて消したりできます。チェック状態を反転することもできます。
- コンテキストメニューで、次のラベルまでの間にある項目をまとめてチェックしたりクリアしたりできます。
- 画面右上にある を押すと、未チェック項目のチェックがやりやすくなる チェック専用モード 表示になります。
- 項目の削除
- 項目名を左にスワイプすると削除ボタンが出てきて項目を削除することができます。
- チェックした項目を一括削除したい場合は、画面上部の をタップしてチェック項目の削除を選んでください。
- コンテキストメニューでは、次のラベルまでの間にある項目をまとめて削除できます。
- 項目の移動
- 画面右上の をタップすると、各項目の右側の をドラッグして項目を並び替えることができます。終わったら再び を押します。
- コンテキストメニューで、他のラベルにこの項目を移動することができます。また次のラベルまでの項目をまとめて移動することもできます。
- 項目の並び替え
- ラベルのコンテキストメニューの「並び替え」でそのラベルの下の項目を並び替えることができます。
- 未チェック項目および優先度高の項目を上にする並べ替えと、項目の名前順にする並べ替えが選べます。
- なお、名前順は文字コードの順なので、漢字の読み順には並ばないことにご注意ください。
- 画面の上のメニューで並べ替えを選ぶと、すべてのラベルに対してその下の項目を並び替えします。
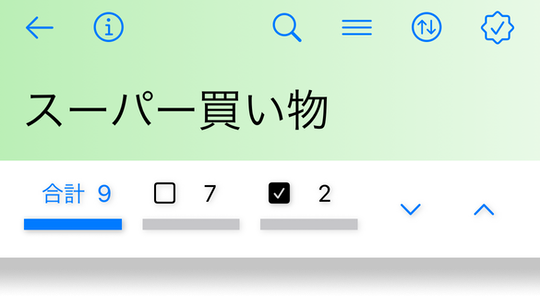
- 項目の絞り込み表示
- 画面の上の合計欄の をタップすると、未チェック項目とラベルだけに絞り込み表示できます。 をタップするとチェック項目とラベルだけの絞り込み表示します。全項目表示に戻すには合計数をタップしてください。
- メニューから「オプション」を選ぶと、絞り込み表示した時にも常に全ラベルを表示するかどうか選べます。
- オプションメニューでは、項目編集画面を抜けても絞り込み状態を保持するか選べます。
- 項目の折り畳み表示
- ラベルの右側の をタップすると、そのラベルの下の項目を折りたたんで隠すことができます。もう一度 をタップすると、折りたたんだ項目を展開して表示することができます。
- 画面の上の合計欄の右にある や をタップすると、全ラベルに対して折りたたみしたり、展開したりできます。
- ラベルだけの折りたたみ表示をしているときにそのラベルの移動や削除をすると、ラベルと次のラベルの間にある折りたたまれた項目もまとめて移動や削除できます。
- リスト名の変更
- 左上のリスト名をタップすると、リスト名を変更することもできます。
- リスト色の変更
- メニューから「カラー」を選ぶと、リストの色を変更することができます。
- 項目の共有
- メニューから「共有」を選ぶと、項目一覧をテキストとして他のAppに共有できます。
- 共有する項目として、全項目か未チェック項目かチェック済み項目か未チェックの高優先項目かを選べます。
- コンテキストメニューで、次のラベルまでの間にある項目をまとめて共有することができます。
- 項目のコピー
- メニューから「コピー」を選ぶと、項目一覧をテキストとしてクリップボードにコピーできます。
- コピーする項目として、全項目か未チェック項目かチェック済み項目かを選べます。
- コンテキストメニューで、その項目のみか次のラベルまでの間にある項目をまとめてコピーすることができます。
- コピーした項目は、他のリストや他のアプリに貼り付けできます。
- 項目の貼り付け
- メニューから「貼り付け」を選ぶと、クリップボードにあるテキストを未チェック項目もしくはチェック済み項目として追加できます。リストの中にすでにある項目は該当の項目をチェックもしくはクリアのみします。また、クリップボードに何もない場合は貼り付けを選べません。
- コンテキストメニューの「貼り付け」から、その項目の下に挿入貼り付けすることもできます。この時もすでにリストの中に同じ項目があるときはチェックもしくはクリアのみします。
- リストの中にすでにある同名項目をチェック・クリアする動作は設定画面で停止することもできます。
- メニューの「貼り付け」からクリップボードの中身を参照したり、クリップボードをクリアすることもできます。
- 一括処理の取り消し
- メニューから「取り消し」を選ぶと、直前にメニューやコンテキストメニューから行った並べ替えや削除などの一操作を1回だけ取り消すことができます。
- 取り消すことができる操作は、チェックとクリア、並び替え、移動、削除、貼り付け、一括登録です。
- 他のリストへコピー
- メニューやコンテキストメニューの「他のリストへのコピー」で他のリストに直接コピーすることもできます。
- 他のリストと比較
- メニューの「ツール」の中の「他のリストと比較」を選ぶとリスト比較画面が表示されて、他のリストと項目の差異を比較して一部の項目を選択コピーできます。
- 重複項目の表示
- メニューの「ツール」の中の「重複する項目を検出」を選ぶと、リストの中で2個以上登録されている項目を表示できます。
- 最初に全ラベルの項目表示を閉じてから実行すると、見つかった重複項目だけ開くので見つけやすいです。
- 項目の検索
- 画面上部の をタップして検索ウィンドウで名前を入力すると、リストの中から該当の名前を含む項目を検索し、表示します。
- 見つかった時に再度検索ウィンドウを開いてもう一度検索ボタンを押すと、次にマッチした項目に移動します。
- 最初に全ラベルの項目表示を閉じてから検索すると、検索で見つかった項目だけ開くので見つけやすいです。
- Aboud the item edit screen
- You can edit and check items on the item edit screen displayed by tapping the list name on the home screen.
- Tap at the top of the screen to open a menu where you can choose what to do with the entire list.
- Tap the context menu button on the right side of each item to open the context menu. processing can be selected.
- The function to change the information of each item can also be used with the button displayed by swiping the item name to the right.
- Labels
- To group multiple items, any item can be a "label" that indicates the group name. Items following a label can be handled together as a group.
- Label is a special item that does not have a checkbox and has a brighter background color and a larger font size than normal items.
- If you add a label for each group of items, you can close or check the items under that label all at once.
- Add Item
- You can enter a new item name by tapping the right side of the + button at the bottom of the screen, and add it as a new item by entering Enter.
- You can add an item anywhere by selecting "Add item below this" from the context menu of each item.
- Open "Batch registration" at the bottom of the screen and tap inside the frame to enter multiple item names separated by line breaks. When you press the "Add each line as an item" button or checkmark button , it will be registered all at once.
- If you enter a name starting with + as the item name, you can make that item a label. You can also label any item later.
- Label item
- To label an item, select Label in the context menu to switch between normal item and labeled item. Items can also be labeled using the "Label" and "Unlabel" buttons that appear when you swipe right on each item.
- Change item name
- If you swipe right on the item or open the context menu, you will see an "Edit name" button. When you press this button, a blue line is displayed under the item name, and you can change the name by tapping the item name at this time. Press Enter to confirm the rename.
- When you confirm the name change, if there are items with the same name in other lists linked to this list, you can choose whether to rename them all at once. If you don't want to change the linked list item names together, you can stop it in the settings screen.
- Change item priority
- Swipe the item to the right or open the context menu to see the "Priority" button. By pressing this button, you can select the priority from high, medium, and low to set the priority of the item.
- It can be used to distinguish the priority of items, such as items that you do not want to forget to buy have high priority, and items that you do not need to buy now have low priority.
- Medium priority is the default value, high priority has a red triangle on the right side of the item name, priority If it's low, you'll see a blue triangle .
- You can also set priority for labels. When the priority of the label is medium or low, a red triangle is displayed if there is an unchecked high priority item under the label. and you can see that there are high priority items even with the labels collapsed.
- Also, if there is at least one unchecked and high priority item in the list, a red triangle will appear next to the list title will be displayed to avoid missing it.
- You can also use the copy and share functions in the menu to focus on high-priority items.
- Change quantity of item
- Swipe right on the item or open the context menu to display the "Quantity" button. If you press this button, you can set the quantity of item by selecting the number from 1 to 10.
- By setting the quantity of items you want to buy more than once, you can display the number to the right of the item name.
- The default value is 1. If you specify 1, the number display disappears from the item display.
- Check item
- You can check or uncheck by tapping the check box of each item.
- check all items at once or uncheck all items at once. You can also invert check status of all items.
- On context menu , items between the next label You can check and clear all at once.
- Press at the top right of the screen to make it easier to check unchecked items Check only mode is displayed.
- Delete item
- If you swipe the item name to the left, the delete button will appear and you can delete the item.
- Select "Check and Clear" from the menu to check or uncheck all items at once. You can also invert the check state.
- You can delete all items up to the next label in the context menu.
- Move item
- Tap the at the top right of the screen to rearrange the items by dragging on the right side of each item. When you're done, press again.
- You can move this item to another label in the context menu. You can also move items up to the next label at once.
- Sort items
- You can sort the items under the label with "Sort" in the context menu of the label.
- You can choose to sort by unchecked items and high priority items, or sort by item name.
- If you select Sort in the menu at the top of the screen, the items under it will be sorted for all labels.
- Filter display items
- By tapping in the total column at the top of the screen, you can narrow down the display to only unchecked items and labels. Tap to narrow down the display to check items and labels only. Tap the total number to return to all items display.
- If you select "Options" from the menu, you can choose whether or not to always display all labels even when narrowed down.
- In the option menu, you can choose whether to keep the narrowed down state even after exiting the item edit screen.
- Fold display items
- Tap the on the right side of the label to fold and hide the items under that label. You can unfold items by tapping again.
- or to the right of the total column on the screen Tap to fold or unfold all labels.
- If you move or delete a label when only the label is folded, the folded hide items between the label and the next label are also moved together. or delete it.
- Rename list
- You can also change the list name by tapping the list name on the upper left.
- Change list color
- You can change the color of the list by selecting "Color" from the menu.
- Item sharing
- If you select "Share" from the menu, you can share the item list as text to other apps.
- You can choose to share all items, unchecked items, checked items, or unchecked high priority items.
- On context menu , items between to the next label Can be shared together.
- Copy item
- You can copy the item list to the clipboard as text by selecting "Copy" from the menu.
- You can choose to copy all items, unchecked items, checked items, or unchecked high priority items.
- On context menu , only that item or up to the next label You can copy the items in between at once.
- Copied items can be pasted into other lists and other apps.
- Paste item
- You can add the text in the clipboard as an unchecked or checked item by selecting "Paste" from the menu. Items already in the list only check or clear the corresponding item. Also, if there is nothing on the clipboard, you cannot select Paste.
- You can also insert and paste below the item from "Paste" in the context menu. At this time, if the same item already exists in the list, it will only be checked or cleared.
- You can also stop checking/clearing items with the same name in the list on the setting screen.
- You can also refer to the contents of the clipboard and clear the clipboard from "Paste" in the menu.
- Undo Batch Processing
- If you select "Undo" from the menu, you can undo the last operation such as sorting or deleting from the menu or context menu just once.
- The operations that can be undone are check/clear, sort, move, delete, paste, and batch registration.
- Copy item to other list
- You can also copy directly to other list with "Copy to other list" in the menu and the context menu.
- Compare with other lists
- Select "Compare with other lists" from "Tools" in the menu to display the List comparison screen. You can select and copy some items by comparing the item differences with other lists.
- Display duplicate items
- If you select "Detect Duplicate Items" from "Tools" in the menu, you can display items that are registered more than once in the list.
- If you first close the item display of all labels and then execute, only the found duplicate items will be opened, making it easier to find.
- Item search
- Tap at the top of the screen and enter a name in the search window to search for that name from the list. Find and display items.
- When found, open the search window again and press the search button again to jump to the next matching item.
- If you close the item display of all labels and then search, only the items found by the search will open, so it is easy to find it.
🔝
チェック専用モード
Check-only mode
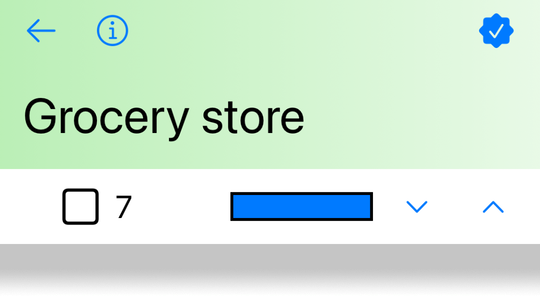
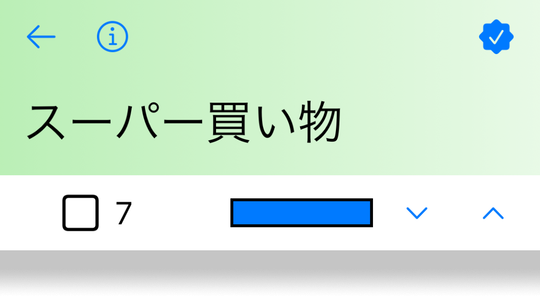
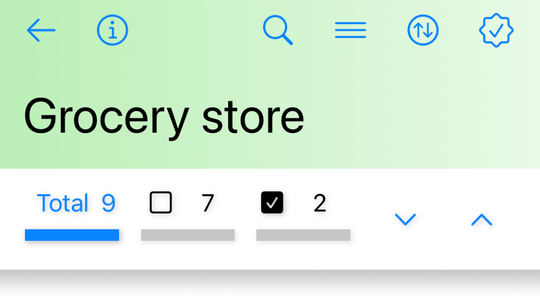
- チェック専用モードについて
- 項目編集画面の右上にある を押して表示を にするとチェック専用モードになります。
- チェック専用モードは買い物時などのために未チェック項目をチェックすることだけに特化したモードです。
- チェック専用モードに入った時に未チェック状態の項目だけを表示し、チェックしてもその項目は取り消し線が引かれるだけで自動的には消えません。
- 画面の上には未チェック項目数とそれを示すバーインジケータを表示します。メニューなど誤操作の恐れがあるボタンは表示しません。
- リストの最後のチェックした項目を非表示にするボタンを押すか、各項目を左スワイプして表示される非表示ボタンを押せばチェックを確定して該当項目を非表示にすることができます。
- チェック専用モードから通常モードに戻るにはをもう一度押して下さい。
- Aboud the check-only mode
- Press
at the top right of the item edit screen to display
If set to, the check-only mode will be set.
- The check-only mode is a mode specialized only for unchecked items for things such as shopping.
- Displays only unchecked items when entering check-only mode, and even if checked, the item is only crossed out and does not disappear automatically.
- Displays the number of unchecked items and a bar indicator at the top of the screen. Menus and other buttons that may be erroneously operated are not displayed.
- Press the button to hide the last checked item in the list, or swipe left on each item and press the hide button that appears to confirm the check. to hide the item.
- Press again to return from check-only mode to normal mode.
🔝
リスト比較画面
List Compare

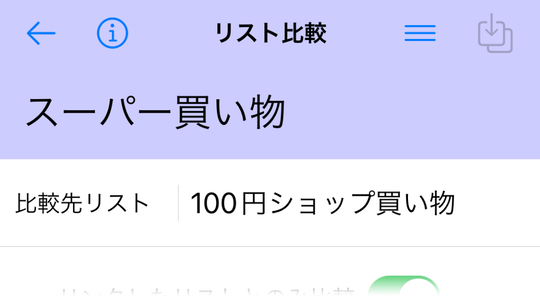
- リスト比較画面について
- 項目編集画面のメニューから「ツール>他のリストと比較」を選ぶとリスト比較画面が表示できます。
- この画面では今編集していたリストと選んだ比較先のリストの項目の有無を比較し、片方のリストにしか存在しない項目を表示します。
- 表示された項目を選んで、互いのリストにコピーしたり、削除したりすることができます。
- 比較先リストをタップすると、比較先のリストを切り替えることができます。
- 「比較先リストのみにある項目」をタップすると「本リストのみにある項目」に切り替わります。これによって、今のリストと比較先リストの項目の差分のうち、どちらのリストにしかない項目を表示するか指定できます。
- 切り替えしても画面の下に項目が表示されない場合は、それぞれのリストに登録されている項目は同じということです。
- コピーしたい項目を左にスワイプもしくは右にスワイプするとコピーや削除ができます。
- 複数の項目をまとめてコピーもしく削除したいときは、該当する項目をチェックしてから、画面上部に表示されたメニューアイコンから、コピーや削除を選んでください。
- Aboud the list comparison screen
- You can display the list comparison screen by selecting 'Tools > Compare with other lists' from the menu of the item edit screen.
- This screen compares the existence of items in the list you are currently editing with the items in the selected comparison destination list, and shows items that exist in only one list.
- You can select the displayed items and copy or delete them from each other's list.
- Tap the comparison destination list to switch the comparison destination list.
- Tap "Items only in comparison list" to switch to "Items only in this list". This allows you to specify which of the differences between the items in the current list and the items in the comparison list should be displayed.
- If the items are not displayed at the bottom of the screen even after switching, it means that the items registered in each list are the same.
- Swipe left or right on the item name if you want to copy or delete it.
- If you want to copy or delete multiple items at once, check the corresponding items and then copy or delete from the menu icon displayed at the top of the screen.
🔝
リンク設定画面
Link Settings
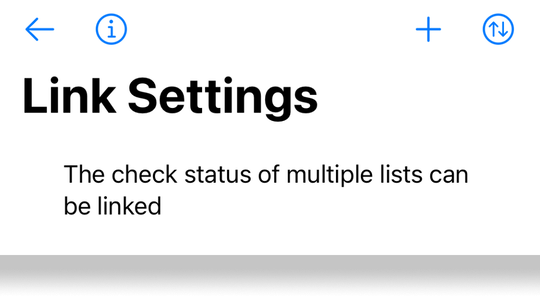
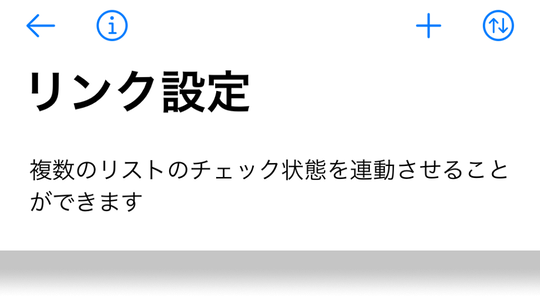
- リンク設定画面について
- ホーム画面の右上のリンクアイコンをタップするとリンク設定画面を開くことができます。
- リンク設定機能を使うと、複数のリンク間で同じ名前の項目のチェック状態を連動させることができます。
- 例えば、複数のスーパーマーケットやコンビニのリストに対して食料品というリンク設定を設定すると、そのリンク設定に含まれるリストのいずれかの項目のチェック状態が変更されると、自動的に他のリストにある同じ名前の項目のチェック状態も更新されます。
- これによって、どこかの店で買えばいい項目を全てのリストで個別にチェック/クリアしなくても良くなります。
- リンク設定の追加
- 画面の左上のをタップするとリンク設定を追加することができます。デフォルトの名前は 「no name」 です。リンク設定は2つまで追加できますが、App内購入を行うと、制限解除によって3つ以上のリンク設定を追加することができるようになります。
- リンク設定名の変更
- リンク設定名はコンテキストメニューで変更できます。
- リンク設定の削除
- リンク設定を左にスワイプすると削除ボタンが出てくるのでそれを押してリストを削除できます。
- リンク設定の並び替え
- 画面右上の を押すと、リンク設定の右側の をドラッグすることでリンク設定を並び替えできます。もう一度 を押すと並び替えモードを終了します。
- リンク設定の編集
- リンク設定名をタップするとリンク編集画面を表示します。
- About the link setting screen
- You can open the link setting screen by tapping the link icon on the upper right of the home screen.
- You can use the link setting function to link the check status of items with the same name between multiple links.
- For example, if you set a link setting called grocery for a list of multiple supermarkets or grocery stores, the check status of any item in the list included in the link setting will be checked. When changed, the check status of the item with the same name in other lists is automatically updated.
- This eliminates the need to check/uncheck individual listings for items you can buy at any store.
- Add link settings
- Tap at the top left of the screen to add link settings. The default name is "no name". You can add up to 2 link settings, but if you make an in-app purchase, you will be able to add 3 or more link settings by removing the restrictions.
- Change link setting name
- You can change the link setting name in the context menu.
- Delete link settings
- If you swipe the link setting to the left, a delete button will appear, and you can press it to delete the list.
- Sort link settings
- Press at the top right of the screen to on the right side of the link settings. You can rearrange the link settings by dragging. Press again to exit the sort mode.
- Edit link settings
- Tap the link setting name to display the link edit screen.
🔝
リンク編集画面
Link Edit
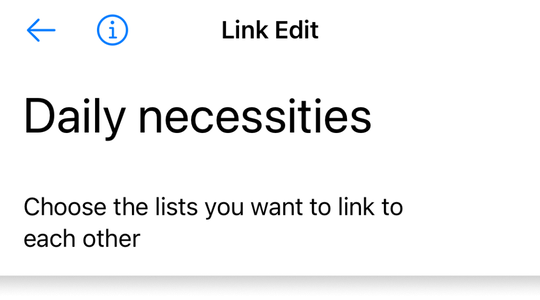
- リンク編集画面について
- リンク設定画面でリンク設定名をタップすると表示される画面です。
- お互いにチェック状態を反映させたい複数のリスト名にチェックを入れてください。
- 画面の上のリンク設定名をタップすると名前を変更することができます。
- Aboud the link edit screen
- This screen is displayed when you tap the link setting name on the link setting screen.
- Check multiple list names that you want to reflect the check status of each other.
- You can change the name by tapping the link setting name at the top of the screen.
🔝
設定画面
Settings
- 設定画面について
- ホーム画面の左上の歯車アイコンをタップすると設定画面を開くことができます。
- 設定画面では各種設定の変更を行ったり、データのバックアップを行ったりできます。
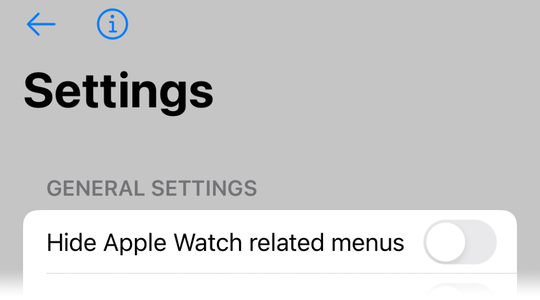
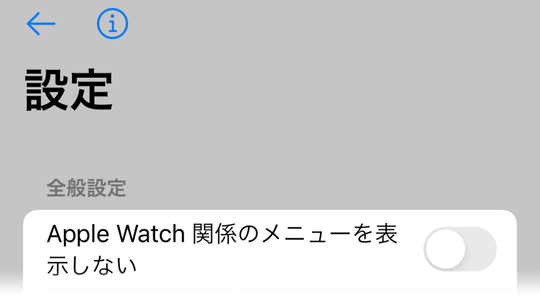
- 全般設定
- Apple Watch を使わないときは Apple Watch 関係のメニュー項目を表示させないようにできます。
- コンテキストメニューボタンが邪魔なときはコンテキストメニューボタンを表示させないようにできます。コンテキストメニューは項目の長押しでも表示できます。
- 操作時の効果音や振動効果(iPhoneのみ)が不要なときはOFFできます。
- 明暗テーマをシステム設定に連動せずに light(明) 、dark(暗) を直接指定できます。
- 項目一覧画面の設定
- 絞り込み表示状態を保持するかどうか変更することができます。
- 常に全ラベルを表示するかどうかを変更することができます。
- 1つのリスト内に同じ名前の項目の追加を禁止するかどうか変更することができます。1つのリスト内に同じ名前の項目があると、リンク機能や iPhone と Apple Watch 間のチェック状態の連動機能などが部分的に機能しなくなるので、基本的にはこのオプションは OFF にすることを推奨します。
- 項目を共有やコピーする時にラベルを含めるかどうか変更することができます。
- 項目の貼り付けや一括登録時に既存項目のチェック状態を変えるかどうか変更することができます。
- 項目名変更時にリンクされた他のリストにも同名の項目があった場合はまとめて名前変更するかどうか変更することができます。
- バックアップ
- 全リストデータおよびリンク設定の保存ができるバックアップ管理画面を開くことができます。
- バックアップ管理画面でバックアップを復元するときに、念の為に自動的にバックアップを自動的に作成するかどうかを変更することができます。
- iPhone/iPad iCloud設定
- 自分の複数のiPhone/iPadのデータを iCloud経由で同期できます。自動同期させることも、マニュアルで同期、アップロード、ダウンロードすることもできます。
- iCloud で自動同期スイッチをONにすると、本アプリの起動時にデータをロードする時にiCloud上のデータの方が新しければダウンロードし、アプリを抜けるときに iCloudにも保存します。
- 参考のため、本デバイスのデータの更新時間とiCloud上のデータの更新時刻が表示されます。もし同じAppleアカウントでアクセスしたデバイスでiCloud上のデータの更新時間が違う場合は、iCloudのファイル同期に時間がかかっています。数分経ってからアプリを立ち上げ直して下さい。
- 同期ボタンを押したら、現在のデータと iCloud上 のデータの新しい方を現在のアプリとiCloudの両方に保存します。
- アップロードボタンを押したら、現在のデバイスのデータを iCloud上 にアップロードします。
- ダウンロードボタンを押したら、iCloud上にあるデータをダウンロードします。
- デフォルトでは自動同期をONにした時や同期ボタンやダウンロードボタンを押したときに自動的にバックアップを取りますが、それをOFFにすることもできます。
- もし「iCloud を有効にして下さい」というメッセージが表示されていたら、本アプリ(lightlist)の iCloud設定がOFFになっています。メッセージをタップして iCloud設定画面を開き、lightlist の設定をONにして下さい。
- 自動同期中に複数のデバイスで同時に本アプリを開いてデータを編集したりすると、最初にアプリを終了した方のデータが後からアプリを終了した方のデータに上書きされる可能性があります。複数のデバイスで同時に本アプリを開く使い方をする場合は自動同期をOFFにして、マニュアルでアップロードやダウンロードした方が安全です。
- 自動同期がうまく働かない時はiCloudとデバイスとの間のデータ反映に時間がかかっている可能性があります。数分経ってから再度アプリを開いてみて下さい。どうしてもうまく同期されない時は、データを有効にしたいデバイスでアップロードボタンを押し、データを取り込みたいデバイスでダウンロードボタンを押してマニュアルでデータを反映させて下さい。
- 自動同期中にiPad のアプリでデータを編集した場合、iPhone のウィジェットやiPhoneとペアリングされているApple Watchのデータは自動的には同期されません。iPhone の Appを一回起動することでこれらに同期および反映します。iPhone のアプリでデータを編集したときに iPad のウィジェットへの反映も同様です。
- 設定リセット
- 各種設定値を初期値に戻すことができます。
- データクリア
- データを全てクリアします。バックアップファイルには影響ありません。
- 制限解除
- App内購入を行うと、制限解除によって6つ以上のリストを作ったり、3つ以上のリンクを作ったりできます。
- このAppについて
- Appバージョンの確認、AppStoreページの表示、Appのレビュー、App作者へのフィードバックが行えます。
- オンラインマニュアルは使い方画面の内容をブラウザで見ることができます。URLをコピーしてPCや他のタブレットで使い方画面を読んだり、使い方画面の内容をブラウザの翻訳機能で翻訳するのに使えます。
- About the setting screen
- You can open the setting screen by tapping the gear icon on the upper left of the home screen.
- On the setting screen, you can change various settings and back up your data.
- General Settings
- You can hide Apple Watch-related menu items when Apple Watch is not in use.
- You can hide the context menu button when it is in the way. The context menu can also be displayed by long-pressing the item.
- You can turn off the sound effects and vibration effects(only on iPhone) during operation.
- You can directly specify light and dark theme without interlocking the system settings.
- Item list screen settings
- You can change whether to keep the filter display state.
- You can change whether to always display all labels.
- You can change whether to prohibit adding items with the same name in one list. If there are items with the same name in one list, the link function and the check state interlocking function between iPhone and Apple Watch will not work partially, so basically it is recommended to turn this option off.
- You can change whether to include labels when sharing or copying items.
- You can change whether to change the check status of existing items when pasting items or batch registration.
- If there are items with the same name in other linked lists when renaming an item, you can change whether to rename them all at once.
- backup
- You can open the backup management screen where you can save all list data and link settings.
- When you restore a backup on the backup management screen, you can change whether to automatically create a backup just in case.
- iPhone / iPad iCloud settings
- You can sync your multiple iPhone / iPad data via iCloud. You can sync automatically or manually sync, upload, and download.
- If you turn on the automatic synchronization switch in iCloud, when you load the data when starting this application, if the data on iCloud is newer, download it and exit the application Also save to iCloud.
- For reference, the data update time of this device and the data update time on iCloud are displayed. If the device accessed with the same Apple account has different update times for data on iCloud, iCloud file synchronization is taking a long time. Please restart the app after a few minutes.
- After pressing the sync button, the newer one of the current data and the data on iCloud will be saved in both the current app and iCloud.
- After pressing the upload button, the data of the current device will be uploaded to iCloud.
- Click the download button to download the data on iCloud.
- By default, it automatically backs up when you turn on automatic sync or when you press the sync button or download button, but you can also turn it off. increase.
- If the message "Please enable iCloud" is displayed, the iCloud setting of this application (lightlist) is turned off. Tap the message to open the iCloud settings screen and turn on the lightlist settings.
- If you open this app on multiple devices at the same time and edit the data during automatic synchronization, the data of the person who closed the app first closed the app later. It may be overwritten on one of the data. If you want to open this app on multiple devices at the same time, it is safer to turn off automatic synchronization and upload or download manually.
- If automatic synchronization doesn't work, it may take some time to reflect the data between iCloud and the device. Please try opening the app again after a few minutes. If you cannot synchronize properly, press the upload button on the device for which you want to enable data, and press the download button on the device for which you want to import data to reflect the data manually.
- If you edit the data in the iPad app during automatic sync, the iPhone widget and the data on the Apple Watch paired with the iPhone will not be synced automatically. Hmm. Sync and reflect on these with a single launch of his app on the iPhone. The same applies when editing data in the iPhone app and reflecting it in the iPad widget.
- Reset settings
- Various setting values can be reset to the initial values.
- Clear data
- Clear all data. Backup files are unaffected.
- Unrestricted
- If you make an in-app purchase, you can make 6 or more lists and 3 or more links by removing the restrictions.
- About this app
- You can check the App version, open the AppStore page, review the App, and give feedback to the App author.
- You can view the contents of the information screen in the online manual with a browser. You can copy the URL and use it to read the information screen on your PC or other tablet, or use your browser's translation function to translate the contents of the information screen.
🔝
バックアップ管理
Backup management


- バックアップ管理画面について
- 設定画面からバックアップ管理画面を開くことができます。
- 登録した全てのリストデータやリンク設定をまとめて1つのファイルに保存し、必要な時に復元できます。
- バックアップファイルはこの iPhone/iPad のストレージと共に iCloud に保存することもできます。
- バックアップファイルは複数作ることができて、念の為メモアプリなど他のアプリに共有して保持しておくこともできます。
- バックアップの作成
- バックアップ作成ボタンを押すと登録した全リストデータやリンクデータをまとめたバックアップファイルを作成します。
- 「iCloudを使う」スイッチをONにすると、バックアップはiCloudにも保存されます。またバックアップ一覧は iCloudに保存されたものを表示し、他のデバイスでiCloudに保存したバックアップをコピーすることもできます。
- 作成したバックアップはバックアップした日時とサイズで表示します。複数のバックアップは新しいものから順番に表示されます。
- バックアップにはコメントを追加することもできます。
- バックアップデータは圧縮されて保持されるので、サイズは目安です。
- バックアップの削除
- 削除したいバックアップを左スワイプして表示される削除ボタンを押してください。
- バックアップのコメント編集
- コメントを付けたいバックアップをタップして表示されるコメント編集ボタンを押してください。
- どのようなバックアップかを示す短いコメントをつけることができます。
- バックアップの共有
- 共有したいバックアップをタップして表示される共有ボタンを押してください。
- バックアップファイルをメールやメモに添付して共有できます。
- バックアップファイルはファイルアプリで lightlist アプリに保存するとアプリ内で削除したバックアップを元に戻したり、他のiOSデバイスにリストデータを一括移動することもできます。
- バックアップのコピー
- iCloudを使うスイッチがONの時はiCloud上のバックアップをデバイスにコピーできます。スイッチがOFFの時はデバイス上のバックアップをiCloudにコピーできます。
- コピー先にすでに同じ名前のバックアップがある時は何もしません。
- バックアップの復元
- 復元したいバックアップをタップして表示される復元ボタンを押して下さい。
- バックアップしたリストデータを復元することができます。復元はバックアップした時の過去のリスト状態に戻すということなので、間違えて実施しないように注意してください。
- iCloud で自動同期中の場合は、同期している他のデバイスにもリストアしたデータが反映されます。
- デフォルトでは念の為に復元前に自動的にバックアップを作成します。操作を間違えて復元してしまった場合は、自動作成されたバックアップで再度復元してください。
- 複数のバックアップの選択
- 画面右上の選択ボタンを押すと、バックアップを複数選択できます。
- 選んだバックアップは画面の上の削除ボタンやアップロード/ダウンロードボタンでまとめて処理ができます。
- Aboud the backup management screen
- You can open the backup management screen from the settings screen.
- All registered list data and link settings can be saved in one file and restored when necessary.
- Backup files can also be stored in iCloud along with this iPhone/iPad storage.
- You can create multiple backup files, and you can share them with other apps such as memo apps just in case.
- Make a backup
- Click the backup creation button to create a backup file that summarizes all the registered list data and link data.
- If you turn on the "Use iCloud" switch, the backup will also be saved in iCloud. The backup list also shows what is stored in iCloud, and you can also copy the backups stored in iCloud on other devices.
- The created backup is displayed by the date and time and size of the backup. Multiple backups are listed starting with the newest one.
- You can also add comments to the backup.
- The backup data is compressed and retained, so the size is a guide.
- Delete backup
- Left-swipe the backup you want to delete and press the delete button that appears.
- Edit backup comment
- Tap the backup you want to comment on and press the comment edit button that appears.
- You can add a short comment to indicate what kind of backup it is.
- Backup sharing
- Press and hold the backup you want to share and press the share button that appears.
- You can share the backup file by attaching it to an email or memo.
- If you save the backup file in the lightlist app with the file app, you can restore the backup deleted in the app or move the list data to other iOS devices at once. increase.
- Backup copy
- When the switch to use iCloud is ON, you can copy the backup on iCloud to the device. When the switch is OFF, the backup on the device can be copied to iCloud.
- Do nothing if the destination already has a backup with the same name.
- Restore backup
- Tap the backup you want to restore and press the restore button that appears.
- You can restore the backed up list data. Be careful not to make a mistake, as restoration means reverting to the state of the list in the past when you backed up.
- If iCloud is auto-syncing, the restored data will be reflected on other syncing devices as well.
- By default, a backup is automatically created before restoration just in case. If you make a mistake and restore it, restore it again with the automatically created backup.
- Select multiple backups
- You can select multiple backups by pressing the select button at the top right of the screen.
- The selected backups can be processed together with the delete button or upload / download button at the top of the screen.
🔝
他App のリストを使う方法
How to use the list of other apps
- 他App の CarbonFin Outliner のリストデータを取り込めます。
- 1. Outliner でリストの作成
- CarbonFin Outliner で買い物リストを作ってください。階層があっても構いませんが、本App では階層を無くしてフラットなリストになります。
- 2. Outliner でリストのURLのコピー
- 使いたいリストの設定画面で「Publish」チェックを入れてください。その下の「Copy URL」を押して、リストのURLをコピーしてください。
- 3. 本AppでリストのURLのペースト
- 本App のホーム画面で新規リスト追加の入力欄にタップを2回すると、「ペースト」と表示されるので、それをタップして コピーしたURLをペーストしてください。
- 4. リストの取り込み
- リスト追加ボタンを押して下さい。
- うまく取り込みできれば、リスト一覧に追加されます。リストが追加されない場合は、URLが間違っていないかブラウザで試してみてください。
- You can import the list data of the CarbonFin Outliner.
- 1. Create a list with Outliner
- Create a shopping list with CarbonFin Outliner. It doesn't matter if there is a hierarchy, but this App eliminates the hierarchy and makes the list flat.
- 2. Copy list URL with Outliner
- Check "Publish" on the setting screen of the list you want to use in this App. Press "Copy URL" below it to copy the URLs in the list.
- 3. Paste the list URL with this App
- If you tap twice in the input field for adding a new list on the home screen of this app, "Paste" will be displayed. Tap it to copy the URL. Please paste.
- 4. Import the list
- Click the Add List button.
- If you can import successfully, it will be added to the list. If the list isn't added, try your browser to make sure the URL is correct.
🔝
ウィジェット
Widget
- ウィジェットについて
- iPhone のホーム画面にチェックリストの一部を常時表示できます。
- ウィジェットの追加方法
- iPhone のホーム画面を長押しすると画面の上の方に表示される「+」ボタンでウィジェットの選択画面になります。ここで lightlist を選んでください。
- ウィジットのサイズを選んでください。ウィジットサイズによって表示できる項目数が変わります。
- 違うリストを表示するウィジェットを複数配置することもできます。
- ウィジェットに好きなリストを追加する
- ウィジェットを長押ししてウィジェットを編集を選んでください。
- そのウィジェットに表示するリストを選べます。選べるリストは自Appで登録したリストです。他Appのリストは選択できません。
- ウィジェットの文字サイズを変更したり、ラベルを表示しないようにすることもできます。また、優先度マークや個数表示をしないようにすることもできます。
- ウィジェットの表示
- ウィジェットには設定したリストのタイトルと、未チェックの項目が先頭から表示できる数だけ表示されます。ウィジェットの背景色はリストの背景色と同じです。ウィジェットをタップすると iPhone App が起動して該当のリストを直接表示できます。
- ロック画面ウィジェット
- iOS16以上の iPhone のロック画面で長押しするとカスタマイズでウィジェットを配置できます。lightlist のウィジェットを選ぶと、大きな長方形なら1つ目のリストの先頭3つの項目、小さい方はアプリを起動できるアイコンが表示できます。
- About widgets
- You can always display a part of the checklist on the iPhone home screen.
- How to add a widget
- Press and hold the iPhone home screen to display the "+" button at the top of the screen to display the widget selection screen. Select lightlist here.
- Choose the size of the widget.. The number of items that can be displayed varies depending on the size.
- You can also place multiple widgets that display different lists.
- Add your favorite list to the widget
- Press and hold the widget and select Edit Widget.
- You can choose the list to display in the widget. The list that can be selected is the list registered in your own app. You cannot select the list of other apps.
- You can also change the font size of the widget or hide the label. You can also turn off the priority mark and quantity number display.
- Widget display
- The widget will display the title of the set list and the number of unchecked items that can be displayed from the beginning. The background color of the widget is the same as the background color of the list. Tap the widget to launch the iPhone App and browse the list directory.
- Lock screen widget
- Press and hold on the lock screen of an iPhone with iOS 16 or higher to customize and place widgets. If you select the lightlist widget, the large rectangle will display the first three items of the first list, and the smaller one will display an icon that can launch the app.
🔝
Apple Watch App のホーム画面
Apple Watch App home screen
- lightlist App が起動した時の画面です。リストの一覧が表示されます。
- リストの登録
- iPhoneで登録や編集したリストは Apple Watch にも自動的に同期されます。同期されてなかった時は、リロードボタンを押して全てのリストを同期するか、iPhone で個別にリストを選んで送信します。
- リストの選択
- リスト名の一覧画面から使いたいリスト名をタップすると項目一覧画面に移ります。
- リストの編集
- リストの削除は iPhone と同じくリスト名を左スワイプして、削除ボタンを表示して押します。リストの移動は移動したいリスト名を長押しすると上下に動かせます。リスト名の変更は iPhone で変更して同期してください。
- リストの再読み込み
- iPhone にあるリストを読み込み直すときはリロードボタンを押してください。
- リストのクリア
- Apple Watch のリストを一旦全クリアする場合はクリアボタンを押ししてください。
- コンプリケーションへの登録
- ウォッチフェースに コンプリケーションとして登録すると、ウォッチフェースから直接 Appを開けます。
- This is the screen when the lightlist App is started. The list names will be shown.
- Register list
- Lists registered or edited on iPhone are automatically synced to Apple Watch. If it's not synced, press the reload button to sync the entire list, or select the list individually on your iPhone and send it.
- Select list
- Tap the list name you want to use from the list name list screen to move to the item list screen.
- Edit list
- To delete the list, swipe the list name to the left as in the iPhone to display the delete button and press it. You can move the list up and down by long-pressing the list name you want to move. Please change the list name on your iPhone and synchronize.
- Reload list
- Tap the Reload button to reload from the iPhone list.
- Clear list
- To clear the entire list of Apple Watch once, tap the clear button.
- Registration for complications
- If you register as a complication on your watch face, you can open the app directly from your watch face.
🔝
Apple Watch App の項目一覧画面
Apple Watch App items screen
- リスト一覧画面でリストを選んだ時に表示される画面です。
- 画面の説明
- 左上にはリスト一覧画面に戻るボタンがあります。また、今日の日付(月はありません)とチェックずみ項目数と全項目数があります。チェックずみ項目数は動的に更新されます。
- 項目一覧の先頭にはリスト名があります。リスト名の右にあるアイコンは、設定画面の「常に項目を保持する」設定の状態に応じて表示が変わります。
- 「常に項目を保持する」設定がONの時は が表示され、項目を再読み込みしたいときにそれを押します。
- 1つでもすでにチェックした項目がある場合は選択肢が表示されます。項目のチェックを続けるなら「チェックを続ける」を選んでください。最初からチェクをやり直すなら「チェックを開始する」を選んでください。
- を長押しすると、iPhone でチェック済みの項目を含めて全項目を再読み込みできます。Apple Watch でチェック済み項目のチェックを外したいときに使います。チェックした項目の削除ボタンを押すと チェック有無情報が iPhone に反映されます。
- 「常に項目を保持する」設定がOFFの時はピンボタンが表示され、タップすると項目情報の保持状態が切り替わります。
- ピンが暗い取り消し表示の場合は項目一覧画面に入るたびに毎回項目をダウンロードし直しますが、明るいピン表示の時は画面を抜けても項目情報を保持し続けます。
- 項目のチェック
- 項目名をタップするとチェックマークがついて、もう一度タップするとチェックが消えます。
- 項目の削除
- 項目名を左にスワイプして削除ボタンを押します。iPhone には項目のチェック状態が反映されます。
- チェックした項目の削除
- チェックした項目の表示を消すときはチェックした項目を削除するボタンを押します。iPhone には項目のチェック状態が反映されます。
- 項目の並べ替え
- 項目を長押しするとドラッグで移動できます。
- This screen is displayed when a list is selected on the lists screen.
- Screen description
- There is a button to return to the list list screen on the upper left. In addition, there are today's date (there is no month), the number of checked items, and the total number of items. The number of checked items is updated dynamically.
- There is a list name at the beginning of the item list. The icon to the right of the list name changes depending on the status of the "Keep items always" setting on the setting screen.
- When the "Keep items always" setting is ON, is displayed, and when you want to reload the item, press it.
- If there is already one checked item, the options will be displayed. If you want to continue checking the items, select "Continue checking". If you want to start the check again from the beginning, select "Start check".
- Long press to reload all items including checked items on iPhone. Use when you want to uncheck a checked item on your Apple Watch. If you press the delete button of the checked item, the checked/unchecked information will be reflected on the iPhone.
- When the "Keep items always" setting is OFF, a pin button is displayed, and tapping it switches the holding state of item information.
- If the pin is dark and the cancellation display is displayed, the item is downloaded again every time the item list screen is entered, but if the pin is bright, the item information is displayed even if the screen is exited. Continue to hold.
- Check item
- Tap the item name to check it, and tap it again to remove the check.
- Delete item
- Swipe the item name to the left and press the delete button. The iPhone reflects the checked state of the item.
- Delete checked items
- To remove the checked items, press the Delete Checked Items button. The iPhone reflects the checked state of the items.
- Sort items
- Press and hold an item to move it by dragging.
🔝
Apple Watch App の設定画面
Apple Watch App setting screen
- リスト一覧画面の左上の をタップして表示される画面です。
- 残りの項目数を表示する
- ONの場合、項目一覧画面の左上の項目数表示にチェックしていない項目数を表示します。
- OFFの場合、合計数とチェック済み項目数を表示します。
- 常に項目を保持する
- ONの場合、項目一覧画面から抜けても常に項目状態を保持する設定にします。項目一覧画面の項目名の右の再読み込みボタンを押すと、項目を再読み込みできます。
- OFFの場合、リスト毎に項目一覧画面から抜けた時に項目状態を保持するかどうかを選択できる設定にします。項目一覧画面の項目名の右のピンボタンを押して、保持と非保持を切り替えられます。
- チェック項目を削除時にiPhoneに反映する
- ONの場合、チェック項目を削除すると iPhone にその項目のチェック状態を反映します。
- OFFの場合、チェック項目を削除しても iPhone のその項目のチェック状態は変わりません。
- 未チェックなら再読み込み確認しない
- ONの場合、Apple Watch で何もチェックしていないリストは確認なしでリロードされます。
- OFFの場合、Apple Watch で何もチェックしていないリストでもリロード時は確認します。
- 設定を初期値に戻す
- 全ての設定値を初期値に戻します。
- This screen is displayed by tapping on the upper left of the list list screen.
- Display the number of remaining items
- When ON, the number of items that are not checked in the item number display on the upper left of the item list screen is displayed.
- If OFF, the total number and the number of checked items are displayed.
- Keep items always
- When ON, set to always keep the item status even if you exit the item list screen. You can reload the item by pressing to the right of the item name on the item list screen.
- When OFF, set whether to keep the item status when exiting the item list screen for each list. You can switch between holding and non-holding by pressing the pin button to the right of the item name on the item list screen.
- Reflect check items on iPhone when deleted
- If the check item is deleted, the check status of the item will be reflected on the iPhone.
- If the check item is deleted, the check status of that item on the iPhone will not change.
- Reload with no confirmation when unchecked
- If ON, unchecked lists on your Apple Watch will be reloaded without confirmation.
- If OFF, even a list that has not been checked on the Apple Watch will be checked when reloading.
- Reset the settings to the initial values
- Reset all the setting values to the initial values.
🔝
コンプリケーション
Complication
- コンプリケーションについて
- Apple Watch の文字盤にチェックリストの一部を表示できます。指定可能なリストはリスト一覧の1つ目から3つ目までのいずれかです。
- 対象となる文字盤
- チェックリストの一部を表示できる文字盤は、インフォグラフモジュラー、モジュラーなど、文字盤の横幅を丸々使ったコンプリケーションが含まれる文字盤です。
- コンプリケーションの設定方法
- 1. iPhone の Watch アプリで、インフォグラフモジュラーやモジュラーなどを選びます。
- 2. 文字盤のコンプリケーションの設定で大きな領域のものを選んで選択肢の中から LIGHTLIST を選びます。
- 3. リストの1つ目から3つ目のうちいずれかを選びます。
- コンプリケーションの表示内容
- コンプリケーションの設定で選んだ1つ目か2つ目のリストの項目の先頭3つまでを表示します。
- リストの順番は Apple Watch における表示順です。
- About complications
- You can display a portion of your checklist on the Apple Watch face. The list that can be specified is one of the first to third list .
- Target watch face
- Part of the checklist can be displayed on watch face that include complications that use the entire width of the dial, such as Infograph Modular and Modular.
- How to set complications
- 1. In the iPhone Watch app, select Infograph Modular or Modular watch face.
- 2. In the complication setting of the watch face, select the one with a large area and select the LIGHTLIST from the options.
- 3. Choose one from the first to third list to show item.
- Complication display
- Displays the first three items of the first or second list selected in the complication settings.
- The order of the list is the display order on Apple Watch.
🔝
困った時は
Trouble shooting
- iPhone の項目を更新しても Apple Watch に送れない
- 項目編集画面のメニューで Watchに送信を選ぶか、一旦リスト一覧画面に戻ってください。そのときに項目が登録されて Apple Watch で再読み込みすれば新しい項目が反映されます。
- Apple Watch にリストが全く送れない
- Apple Watch App で 「iPhone からリロード」をしても iPhone からリストが送られない時は下記の操作を試してください。
- Apple Watch のサイドボタンを押して lightlist を選んで左にスワイプして削除ボタンを押して App を一旦終わらせてください。その後に再度 Apple Watch App を起動してから Apple Watch App で リロードボタンを押してみてください。
- iCloud が使えない
- 設定アプリで iCloud Drive を有効にしてください。
- iCloud で同期を開始した時にデータがおかしくなった
- 本アプリは同期開始した時に iCloudにあるデータが他のデバイスで1から作ったデータならデバイスにあるデータとマージし、そうでないならiCloudにあるデータとデバイスのデータの新しい方を使います。もし初回マージがうまくいかなかった時はそのデータを手作業で修正してアップロードするか、もしくは採用したい側のデータのデバイスに自動バックアップされているデータをリストアして下さい。
- 機能制限解除の購入で画面が変わらない
- 一度リスト一覧画面に戻ってから再度設定画面を表示してみてください。
- Updated items cannot be sent to Apple Watch
- Select Send to Watch from the menu of the item edit screen, or return to the list list screen once. If the item is registered at that time and reloaded on Apple Watch, the new item will be reflected.
- Unable to send list to Apple Watch at all
- If the list is not sent from the iPhone even after "Reload from iPhone" on the Apple Watch App, try the following operations.
- Press the side button on your Apple Watch, select lightlist and swipe to the left and press the delete button to quit the app. Then launch the Apple Watch App again and try press reload button in the Apple Watch App.
- Cannot use iCloud
- Enable iCloud Drive in the Settings app.
- Data went wrong when I started syncing with iCloud
- This app merges the data in iCloud with the data in the device if it was created from 1 on another device when synchronization starts, otherwise the data in iCloud And use the newer one of the device data. If the initial merge does not work correctly, please manually correct and upload the data, or restore the data that is automatically backed up to the device of the data you want to adopt.
- The screen does not change with the purchase of the function restriction release
- Please return to the list list screen from the item edit screen of iPhone. At that time, the item will be registered and the new item can be reflected on Apple Watch.
🔝
バージョン履歴
Version History
- ver.2.16
- 項目編集画面でメニューやラベルのコンテキストメニューに項目の並び替えを追加しました。
- 項目編集画面で並べ替えや削除などの一括処理を取り消しできる取り消しボタンをメニューに追加しました。
- 項目編集画面で項目追加や一括項目追加領域を画面の一番下に配置しました。
- iOS16.4 で項目移動モード時の画面が正しく表示されないことがある不具合を修正しました。
- iOS15 でリストが削除できない不具合を修正しました。
- ver.2.15
- iOS16で項目編集画面で1項目追加や複数項目一括追加を繰り返した時にクラッシュする不具合を修正しました(この時のキーボードを避けるスクロール動作は一時的に停止)
- 項目編集画面とリンク編集画面でタイトル名が長い時に自動的にフォントサイズを縮小するようにしました。
- ホーム画面とリンク設定画面でも項目名を右ドラッグして名前編集できるようになりました。
- ver.2.14
- ホーム画面でリスト追加欄の常時表示の代わりにプラスボタンを追加しました。
- ホーム画面でリスト追加する時に既存リストの先頭にも追加できるようにしました。
- 項目編集画面で項目名入力時にソフトキーボードで該当項目が隠れないようにしました。
- 編集項目画面で長い項目名を編集する時にiOS16の場合は複数行表示のまま編集できるようにしました。
- 編集項目画面でツールの重複項目検出時にリスト内で閉じている重複項目を開いて見つけやすくしました。
- 軽微な不具合を修正しました。
- ver.2.13
- チェック状態が反映されないことがある不具合を修正しました。
- ver.2.12
- iOS16のロック画面の Widget をサポートしました。
- Apple Watch のコンプリケーションで優先度高の項目を優先表示するようにしました。
- iPad App と Apple Watch App の間の iCloud経由データ同期を改善しました。
- ver.2.11
- 項目編集画面で各項目に優先度と個数の設定と表示ができるようになりました。Widget や Apple Watch の表示にも反映されます。
- 項目編集画面の項目名編集モードを廃止しました。項目名はコンテキストメニューから変更できます。
- 項目編集画面のメニューに「他のリストへのコピー」を追加しました。
- 設定画面で明暗テーマの選択ができるようになりました。
- ver.2.10
- 項目名変更時にリンクされた他のリストにも同名の項目があった場合はまとめて名前変更できるようになりました。
- バージョンアップ後の最初の起動時の画面でバージョン履歴を表示するようにしました。
- 使い方画面の操作ボタンをわかりやすくしました。
- 軽微な不具合を修正しました。
- ver.2.9
- 使い方画面を全てのページから表示できるようになりました。
- 軽微な不具合を修正しました。
- ver.2.8
- 操作時の効果音や振動効果を追加しました。設定画面でOFFすることもできます。
- 軽微な不具合を修正しました。
- ver.2.7
- 項目編集画面で各ラベルの下の項目を折り畳みできるようにしました。
- 項目編集画面のラベルのみフィルターボタンの代わりに一括折り畳みボタンと一括展開ボタンを追加しました。
- 項目編集画面の検索結果のUIを改善しました。
- 項目編集画面の貼り付けメニューの項目を拡張しました。
- 項目編集画面のチェック専用画面で未チェック項目数とバー表示を表示するようにしました。
- リスト比較画面で項目名の左右スワイプでコピーや削除をできるようにしました。
- ver.2.6
- 各画面のリストの各項目の右端にコンテキストメニューボタンを追加しました。
- 項目編集画面のコンテキストメニューを整理し、できることを増やしました。
- 項目編集画面のコンテキストメニューに他のリストへのコピーを追加しました。
- 項目編集画面の各項目を右スワイプして項目名編集モードの切り替えとラベル化の切り替えができるようになりました。
- 項目編集画面の項目名編集モード切り替えアイコンのデザインを変更しました。との代わりに とになりました。
- 項目編集画面の調査メニューはツールメニューに名前を修正しました。
- 設定ページに全般設定を追加しました。
- 設定ページにデータクリアを追加しました。
- コピー&ペーストの動作を改善しました。
- リンク設定名をコンテキストメニューから変更できるようになりました。
- バックアップ画面のコピー機能の文言を修正しました。
- ver.2.5
- Apple Watch でリスト項目の再読み込みで長押しすることでチェック済み項目を含めた全項目を再読み込みし、チェックを外すことができるようになりました。
- Apple Watch のコンプリケーションでリストの先頭項目を表示することができるようになりました。
- ver.2.4
- 項目編集画面のコンテキストメニューで1項目もしくは次のラベルまでの複数の項目をまとめて他のラベルに移動できるようになりました。
- iPhone,iPad と AppleWatch の設定画面で設定情報を初期値に戻せるようになりました。
- ホーム画面の他Appのリスト取り込み欄を新規リスト追加欄に統合しました。
- ver.2.3
- 項目編集画面にチェックだけに特化したチェック専用モードを追加しました。
- 項目編集画面のメニューに調査メニューを追加しました。
- 他のリストと項目の有無を比較し、片側にしかない項目を選んでコピーできるようになりました。
- リストの中の重複している項目を検出できるようになりました。
- リスト一覧画面のコンテキストメニューにリスト名変更とリスト比較を追加しました。
- ver.2.2
- iPadをサポートしました。
- iPadとiPhoneのデータをiCloud経由で同期できるようになりました。
- バックアップをiCloudに保存できるようになりました。
- バックアップにコメントをつけられるようになりました。
- 項目編集画面で項目を検索できるようになりました。
- 項目編集画面のチェック専用画面で未チェック項目数を表示するようにしました。
- ver.2.1
- 全リストデータを一括でバックアップや復元できるバックアップ管理機能を追加しました。
- ver.2.0
- リスト間でチェック状態を連動できるリンク設定機能を追加しました。
- ver.1.8
- Apple Watch でのチェック項目の削除をウィジェットにも反映するようにしました。
- ver.1.7
- アプリのアイコンを変更しました。
- 項目編集画面のメニューに共有を追加しました。
- 項目編集画面のオプションメニューで共有やコピーする時にラベルを含めるかどうか設定できるようになりました。
- Apple Watch のリスト表示エリアが狭かったのを修正しました。
- ver.1.6
- リスト一覧の並べ替え時に並べ替え状態から勝手に抜けてしまうことがある不具合を修正しました。また、並び替えボタンの見た目を上下矢印に変更しました。
- 項目編集画面でラベルのみの絞り込み表示ができるようになりました。項目編集画面でラベルのみの絞り込み表示時は移動や削除はラベルとその下の項目をまとめて移動もしくは削除できます。
- 項目編集画面のコンテキストメニューで次のラベルまで項目をコピーもしくは削除できるようになりました。
- 項目編集画面でコピーした項目を貼り付けできるようになりました。一部の項目を他のリストにコピーする時に使います。
- 項目編集画面のチェックとクリアメニューで全項目のチェック状態を反転できるようになりました。
- 項目編集画面のオプションメニューで絞り込み状態の保持を設定できるようになりました。
- Apple Watch でチェックした項目を削除したときに、iPhone側の項目にチェック状態を反映できるようになりました。
- iPhone App で複数のリストを更新した時に Apple Watch App が操作中でなくてもリストが反映されるようになりました。
- iPhone App で項目を変更した時に、Apple Watch で項目にチェックしていない時は確認無しにリロードできるようになりました。
- App内購入をしていない場合の登録可能項目数の制限を緩和しました。
- ver.1.5
- Apple Watch のリスト一覧画面で再読み込みした際に iPhone側のリスト順に並ばない場合があったのを修正しました。
- Apple Watch の項目一覧画面の再読み込み時に、Apple Watch のチェックを継続するか最初からチェックを行うか選択できるようにしました。
- 項目編集画面のメニューでApple Watch にリストを送信した時に、Apple Watch でチェック途中の状態を継続するかやり直すか選択できるようにしました。
- ver.1.4
- 項目編集画面のコンテキストメニューで任意の項目の次に項目追加できるようになりました。
- 項目編集画面のオプションメニューで同じ項目名の追加の許可不許可を設定できるようになりました。
- 設定画面でこのAppのバージョンを確認したり、AppStoreのページを開いたり、App作者にフィードバックすることができるようになりました。
- Apple Watchで常に項目を保持する設定の時はピンボタンの代わりに再読み込みボタンを表示するようにして、再読み込みがやりやすくなりました。
- ver.1.3
- 項目編集画面で未チェック項目のみやチェック済み項目のみの絞り込み表示ができるようになりました。
- 項目表示画面で任意のラベルの下の項目を一括チェック、クリアできるようになりました
- リストの複製ができるようになりました。
- Apple Watchでのリストのリロードや一括削除はボタン長押しではなくタップで確認画面を出すようにしました。
- ver.1.2
- ウィジェットとして先頭の数個から十数個の未チェック項目をiPhoneのホーム画面上に常時表示できるようになりました。
- 項目のグルーピングのためにラベルを使えるようになりました。
- 項目編集画面で新しい項目を好きな位置に挿入できるようになりました。
- 項目一覧をテキストとしてクリップボードにコピーして再利用できるようになりました。
- 項目編集画面でチェック済み項目を一括削除できるようになりました。
- 他Appのリストを後からいつでも取り込めるようになりました。
- ver.1.1
- リスト毎に好きな色を設定できるようになりました。
- 項目名をタップしたときに項目名を編集する代わりにチェックできるようになりました。
- 他アプリのリストのリンクを登録する代わりにリストを取り込むことができるようになりました。
- ver.1.0
- 新規開発
- ver.2.16
- Added item sorting to the menu and the label context menu on the item edit screen.
- Undo button has been added to the menu that allows you to undo batch processing such as sorting and deleting items on the item edit screen.
- In the item edit screen, the item addition and batch item addition areas have been placed at the bottom of the screen.
- Fixed a bug that the screen may not be displayed correctly when moving item mode on iOS 16.4.
- Fixed a bug that list cannot be deleted on iOS15.
- ver.2.15
- Fix for a bug that crashes when repeatedly adding one item or adding multiple items at once on the item edit screen on iOS16. Auto scrolling to avoid the keyboard at this time is stopped temporarily.
- The font size is automatically reduced when the title name is long on the item edit screen and link edit screen.
- It is now possible to right-drag the item name on the home screen and the link setting screen to edit the name.
- ver.2.14
- Added a plus button instead of always displaying the add list field on the home screen.
- When adding a list on the home screen, it is now possible to add it to the top of the existing list.
- When editing an item name on the item edit screen, the corresponding item is not hidden by the soft keyboard.
- When editing a long item name on the edit item screen, in the case of iOS16, it is now possible to edit while displaying multiple lines.
- On the edit item screen, when the duplicate item detection tool detects duplicate items, we opened the closed duplicate items in the list to make them easier to find.
- Fixed minor bugs.
- ver.2.13
- Fixed a bug that the check status may not be reflected.
- ver.2.12
- Support Widget of lock screen on iOS16.
- High priority items are now prioritized in Apple Watch complications.
- Improved data sync via iCloud between iPad App and Apple Watch App.
- ver.2.11
- You can now set and display the priority and quantity for each item on the item edit screen. It is also reflected in the display of Widget and Apple Watch.
- The item name edit mode has been abolished on the item edit screen. The item name can be changed from the context menu.
- "Copy to other list" was added to the menu of the item edit screen.
- You can now select light and dark themes on the settings screen.
- ver.2.10
- When renaming an item, if there are items with the same name in other linked lists, it is now possible to rename them all at once.
- The version history is now displayed on the first startup screen after upgrading.
- The operation buttons on the usage screen have been made easier to understand.
- Fixed minor bugs.
- ver.2.9
- The information screen can now be displayed from all pages.
- Fixed minor bugs.
- ver.2.8
- Added sound effects and vibration effects when operating. You can also turn it off on the setting screen.
- Fixed minor bugs.
- ver.2.7
- Items under each label can now be fold on the item edit screen.
- Added Batch fold button and Batch unfold buttons instead of the Filter Only Labels button on the item edit screen.
- Improved the UI of search results on the item edit screen.
- Expanded the items in the paste menu on the item edit screen.
- The number of unchecked items and bar indicator are now displayed on the check-only screen of the item edit screen.
- You can now copy or delete items by swiping left or right on the list comparison screen.
- ver.2.6
- Added a context menu button to the right edge of each item in the list.
- The context menu on the item edit screen has been organized and there are more things you can do.
- Added copy to other list to the context menu of the item edit screen.
- It is now possible to switch between item name edit mode and labeling by swiping right on each item on the item edit screen.
- The design of the item name edit mode switching icon on the item edit screen has been changed. and instead of and .
- The Investigation menu on the item edit screen has been renamed to the Tools menu.
- Added general settings to the settings page.
- Added data clear to the settings page.
- Improved copy and paste behavior.
- You can now change the link setting name from the context menu.
- Fixed the wording of the backup screen copy function.
- ver.2.5
- You can now reload all items, including checked items, and then uncheck them by long-pressing on reload list items on Apple Watch.
- Top items of list can now be viewed in complications on Apple Watch.
- ver.2.4
- It is now possible to move one item or multiple items up to the next label together to another label in the context menu of the item edit screen.
- The settings can be reset to the initial value on the setting screen of iPhone, iPad and Apple Watch.
- The list import field of other apps on the home screen has been integrated into the new list addition field.
- ver.2.3
- A check-only mode dedicated to checking has been added to the item list screen.
- An inspection menu has been added to the menu of the item list screen.
- You can now compare the presence or absence of items with other lists and select and copy items that are only on one side.
- You can now detect duplicate items in the list.
- Added rename list and list comparison to the context menu of the main screen.
- ver.2.2
- iPad is supported.
- You can now sync iPad and iPhone data via iCloud.
- You can now save backups to iCloud.
- You can now comment on backups.
- You can now search for items on the item edit screen.
- ver.2.1
- A backup management function has been added that allows you to backup and restore all list data at once.
- ver.2.0
- Added a link setting that can link check status between lists.
- ver.1.8
- Changed to reflect the deletion of check items on Apple Watch to the Widget.
- ver.1.7
- Changed the app icon.
- Added sharing to the menu of the item edit screen.
- It is now possible to set whether to include labels when sharing or copying in the option menu of the item edit screen.
- Fixed the list display area of Apple Watch being narrow.
- ver.1.6
- Fixed a bug that sometimes the list is unsorted when sorting. Also, the appearance of the sort button has been changed to an up and down arrow.
- It is now possible to narrow down and display only labels on the item edit screen. When narrowing down the label only on the item edit screen, you can move or delete the label and the items below it together.
- You can now copy or delete items up to the next label in the context menu of the item edit screen.
- You can now paste the copied item on the item edit screen. Used when copying some items to another list.
- You can now invert the check status of all items in the check and clear menus on the item edit screen.
- It is now possible to set the retention of the narrow down state in the option menu of the item edit screen.
- When you delete the checked item on Apple Watch, the checked state can be reflected in the item on the iPhone side.
- When updating multiple lists in the iPhone App, the lists are now reflected even when the Apple Watch App is not in operation.
- When changed the list item in the iPhone App, if items are not checked on the Apple Watch, it can be reloaded without confirmation.
- The restriction on the number of items that can be registered when not making an in-app purchase has been lifted.
- ver.1.5
- Fixed an issue where reloading the list on Apple Watch sometimes did not line up in the same order on iPhone.
- When reloading the item list screen of Apple Watch, you can now select whether to continue checking on Apple Watch or start checking.
- When sending a list to Apple Watch in the menu of the item edit screen, you can now select whether to continue or redo the state being checked on Apple Watch.
- ver.1.4
- You can now add the next item in the context menu of the item edit screen.
- You can now set whether to allow or disallow additional items with the same item name in the option menu of the item edit screen.
- You can now check the version of this app on the settings screen, open the AppStore page, and give feedback to the app author.
- When setting to always keep items on Apple Watch, the reload button is displayed instead of the pin button, making reloading easier.
- ver.1.3
- It is now possible to narrow down and display only unchecked items or checked items on the item edit screen.
- Items under any label can now be checked and cleared at once on the item display screen
- You can now duplicate the list.
- When reload or deleting a list on Apple Watch, a confirmation screen is displayed on tap the button instead of pressing and holding the button.
- ver.1.2
- As a widget, some of unchecked items from the top can now be displayed on the iPhone home screen at all times.
- You can now use labels for grouping items.
- You can now insert a new item at any position on the item edit screen.
- You can now copy the item list as text to the clipboard and reuse it.
- Checked items can now be deleted at once on the item edit screen.
- You can now import the list of other apps at any time later.
- ver.1.1
- You can now set your favorite color for each list.
- You can now check the item name instead of editing it when you tap it.
- You can now import the list instead of registering the link of the list of other apps.
- ver.1.0
- New development
- 最新バージョンの情報へ↑
- goto latest version information ↑